Table of Contents
Introduction
The user administration provides all functions to control the login and permissions of users in foreknown. Therefore, a user must be created for each person who is to be granted access for foreknown and provided with the necessary properties and roles.
The user administration is opened via the menu item "System Administration / Users". Access to the user administration is only possible for users with the role "Account administrator".
The following describes how you create new users, make changes to existing users, assign permissions and remove users. The action menu, which each entry in the list offers via the three points, also plays an important role.

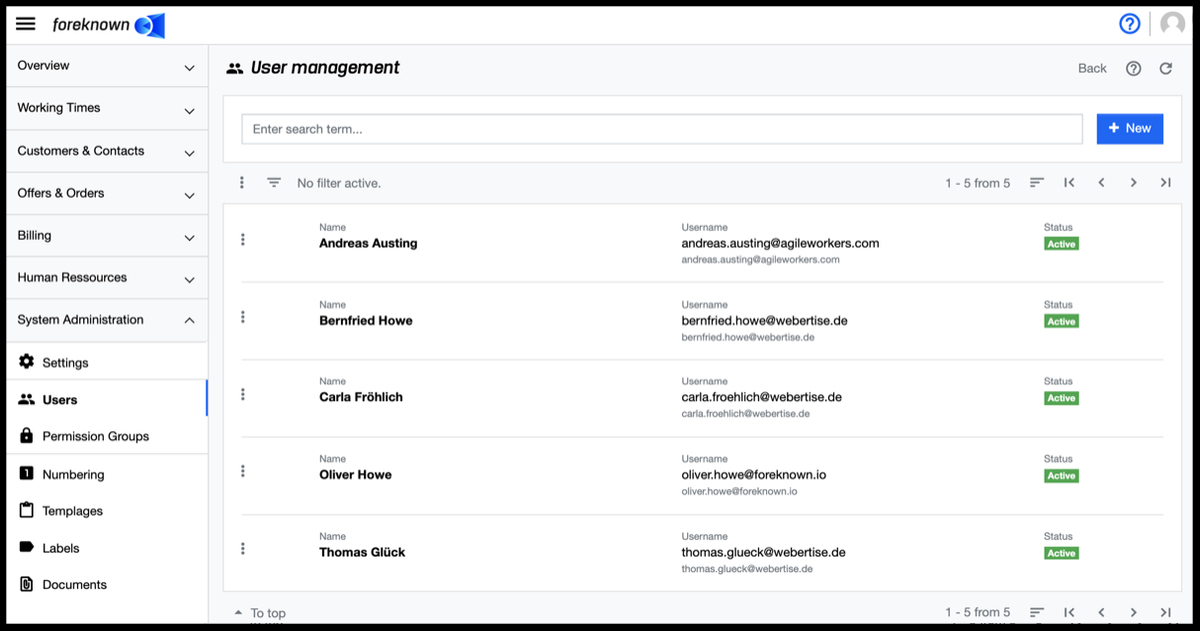
Search User
In the upper area of the user administration you will find the search field and the "+ New" button (see also Create User). Below this area all already created users are displayed in form of a scrollable, sortable and filterable list.
If you now enter a search term into the input field, e.g. a part of the first or last name or the user name, the list will directly show only those users that contain the entered search term in one of the above mentioned properties. In this way, individual users can be found and edited quickly.
Filter Users
In addition to the search function, the user administration also offers a filter dialog. In foreknown, this is always located as a fold-out dialog on the right-hand side. The filter dialog can be expanded and collapsed by clicking on the button with the three dashes above the list on the left.
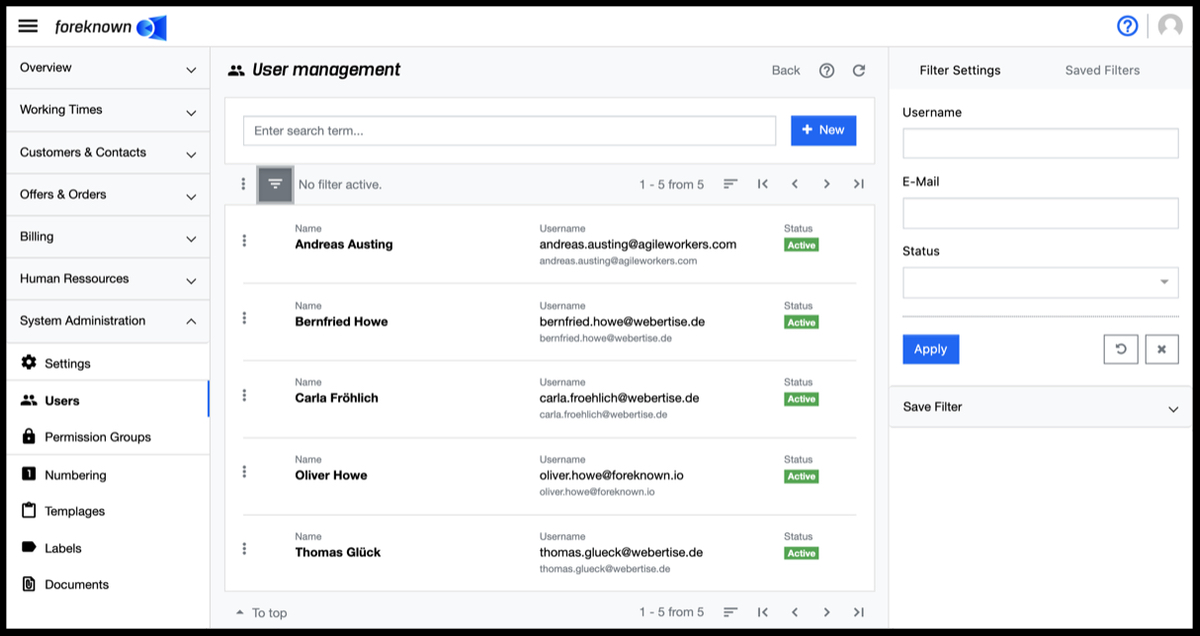
The following filter options are offered:
- User Name: Any component in the user name.
- E-Mail: Any component in the e-mail address e.g. only according to the domain of the e-mail address.
- Status: Users that have a certain status can be filtered (Active, Inactive, Waiting, Locked).
The "Apply" action will display all users in the list that match the filter criteria. The "x" action removes all filter settings and the list shows all users again. The "Reset" action (icon: arrow in a circle) discards all changes that may have been made to a saved filter.
For general information on the filter options, see also the chapter Basics: Filters.
Create User
To create a new user, click on the "+ New" button located at the top right of the search box. This button opens the popup dialog "Create User".
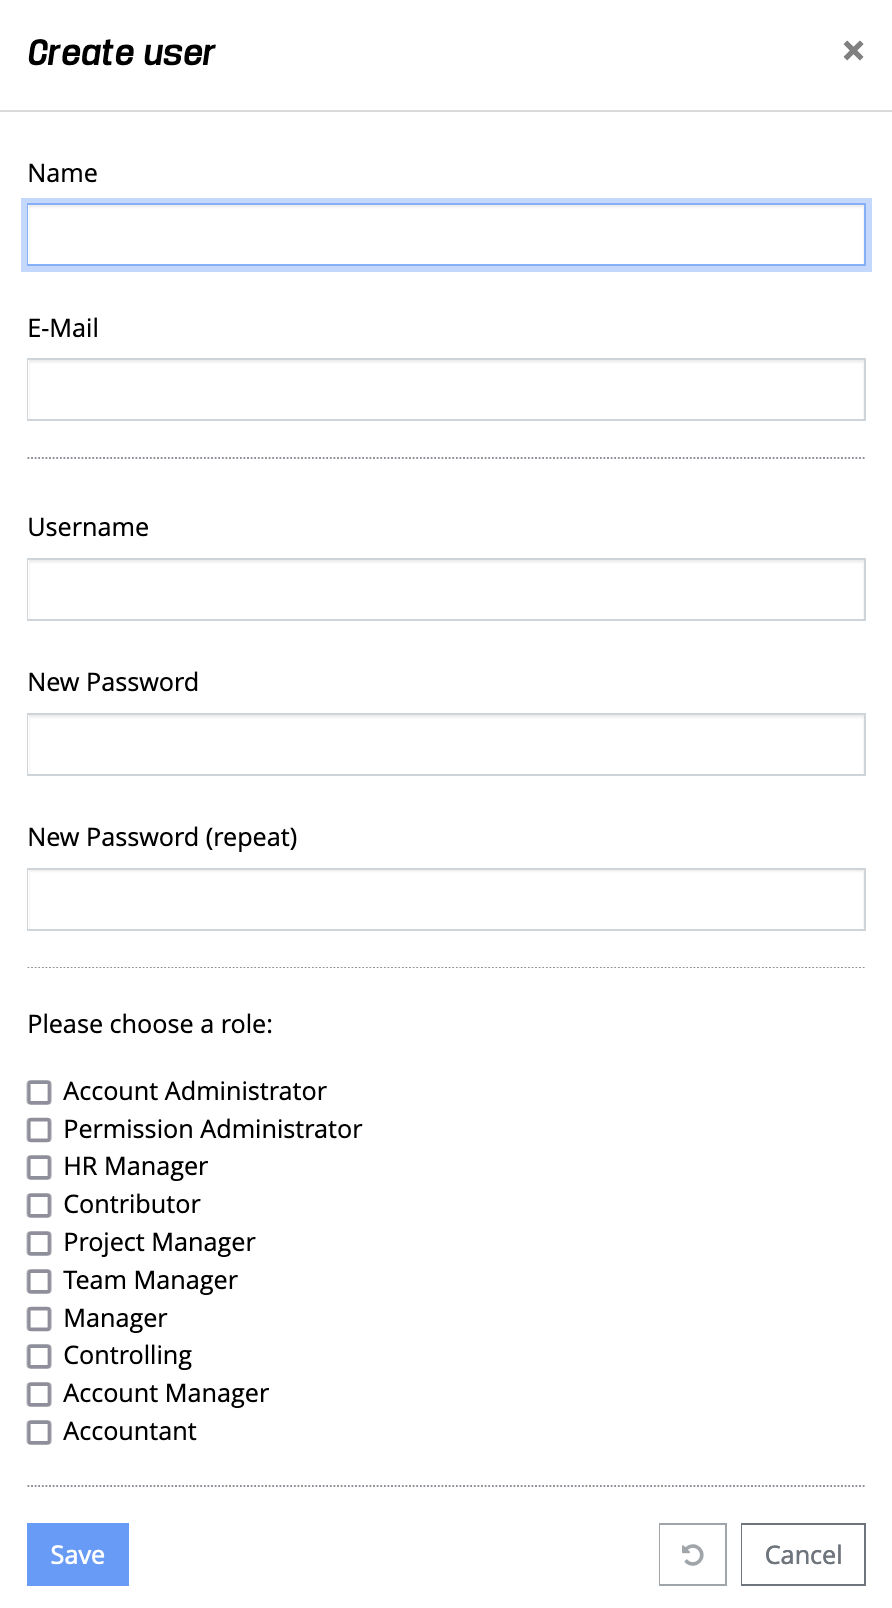
The following user properties must be specified for a new user:
- Name: First and last name of the user.
- E-Mail: A valid e-mail address. This will be used for notifications from foreknown to the user, for example.
- User Name: A unique name for the user, e.g. the email address. The username is used for logging into foreknown.
- New Password: Enter a secure password. Upper and lower case letters, numbers and special characters should be used. A password must be at least 8 characters long.
- New Password (Repeat): Enter the password again to make sure that the password was entered correctly.
- Permissions: Via predefined roles, users can be assigned certain permissions in foreknown. The meaning of each role is described in detail below (see Roles in foreknown).
The "Save" action is used to save the new user. With the action "Reset" and "Cancel" the entries are discarded and in case of the action "Cancel" the dialog is closed.
Roles in foreknown
The permissions of users in foreknown are controlled by roles that have been assigned to a user via user management. The following roles are available:
-
Account Administrator: Users with this role have full access to the "System Administration" area. Only the assignment of roles to users is restricted to the "Contributor" role.
-
Permission Administrator: Users with this role have full access to the "System Administration / Users" area and can assign all roles to users.
-
HR Manager: Users with this role have access to the areas "Overview / Home", "Working Hours", "Project Management" and "Human Resources". Only HR Managers can view and manage employees and their contracts.
-
Contributor: Users with this role have access to the areas "Overview / Home", "Working hours" and "Project Management".
-
Project Manager:** Users with this role have access to the areas "Overview / Home", "Working hours" and "Project Management". They have extended access to projects, e.g. to view the controlling data of the order items. Furthermore, the project manager has access to the subpages "Service transfer", "Services" and "Rules" of the "Billing" area. Here the access is exclusively to data from the projects of the project manager and public projects.
-
Team Manager: Users with this role have access to the areas "Overview / Home", "Working hours", "Project Management" and "Human Resources / Teams". The team manager can view the team's controlling data and lock and unlock working hours for team members.
-
Manager: Users with this role have access to the areas "Overview / Home", "Overview / Finance, "Working Hours" and "Project Management". However, in the "Overview / Finance" area, only the dashboard on the level of of the business unit where the user has been assigned as a manager.
-
Controlling: Users with this role have access to the areas "Overview / Home", "Overview / Finance", "Overview / Operations", "Working Hours" and "Project Management". The Controlling role is the only one that gives full access to the finance dashboards.
-
Account Manager: Users with this role have access to the areas "Overview / Home", "Working Hours", "Customers & Contacts", "Offers & Orders", "Project Management" and "System Administration / Text Blocks".
-
Accountant: Users with this role have access to the areas "Overview / Home", "Working Hours", "Project Management", "Billing" and "System Administration / Text Blocks". This role is needed if you want to use all functions under Billing such as the Invoice Assistant.
Edit User
The properties of an existing user can be changed via three popup dialogs. These popup dialogs are accessed via the actions of the pull-down menu, which is offered in front of each user in the list.
Change User Name
The following dialog opens via the action menu with the "Change User Name" action:
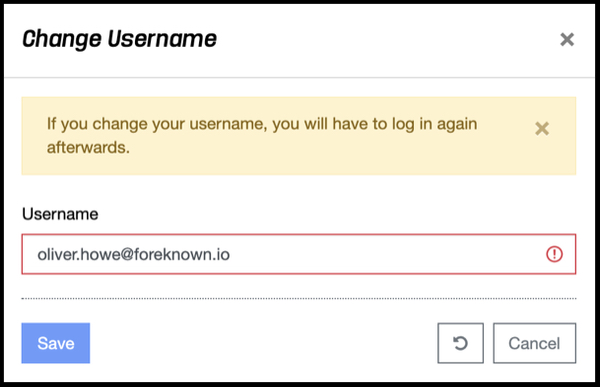
The username is used for logging in to foreknown and must therefore be unique. Format and uniqueness are checked directly during input and corresponding error messages are displayed. The "Save" action saves the new username for the user. The changes can be discarded using the "Reset" and "Cancel" actions. The latter action closes the popup dialog.
Change Password
The following dialog opens via the action menu with the "Change Password" action:
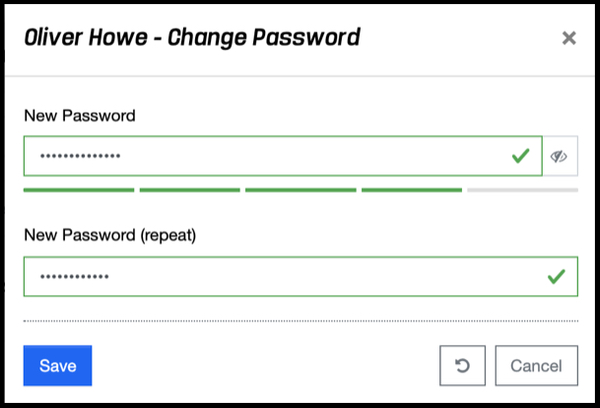
The password is used for logging in to foreknown and therefore should have a secure format. The strength of the password is represented by the color highlighted bars. Passwords that provide poor security cannot be saved. Ideally, a password should consist of letters, numbers and special characters and have a minimum length of 8 characters.
For security, the password must be entered twice. In addition, the "Show Password" button (symbol: eye) can be used to display the password entered in order to be able to check the entry.
The "Save" action saves the new password for the user. The next time the selected user logs in, the new password must be applied. The changes can be discarded using the "Reset" and "Cancel" actions. The "Cancel" action closes the popup dialog.
Update User
The following dialog opens via the action menu with the "Edit User" action:
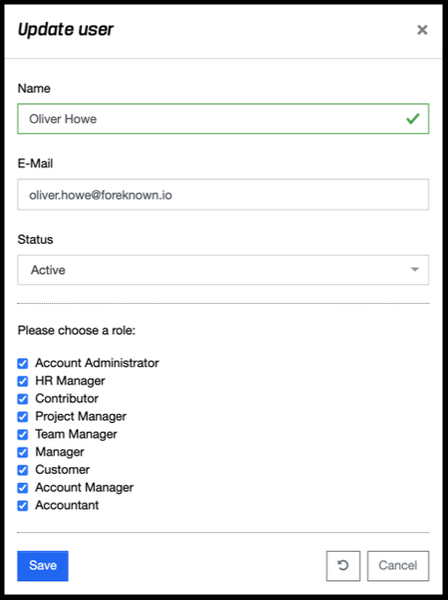
This dialog provides the option to customize the name, e-mail address, status and role assignments for the selected user. The changes to the roles only take effect when the user has logged in again.
The "Save" action saves all changes for the user. The changes can be discarded using the "Reset" and "Cancel" actions. The latter action closes the popup dialog.
Delete User
The action menu with the "Delete User" action opens a confirmation dialog. The deletion process must be confirmed again with the "Delete" action before the user is deleted.
NOTE: A user can only be deleted if there are no services in the system for this user yet.