Table of Contents
Introduction
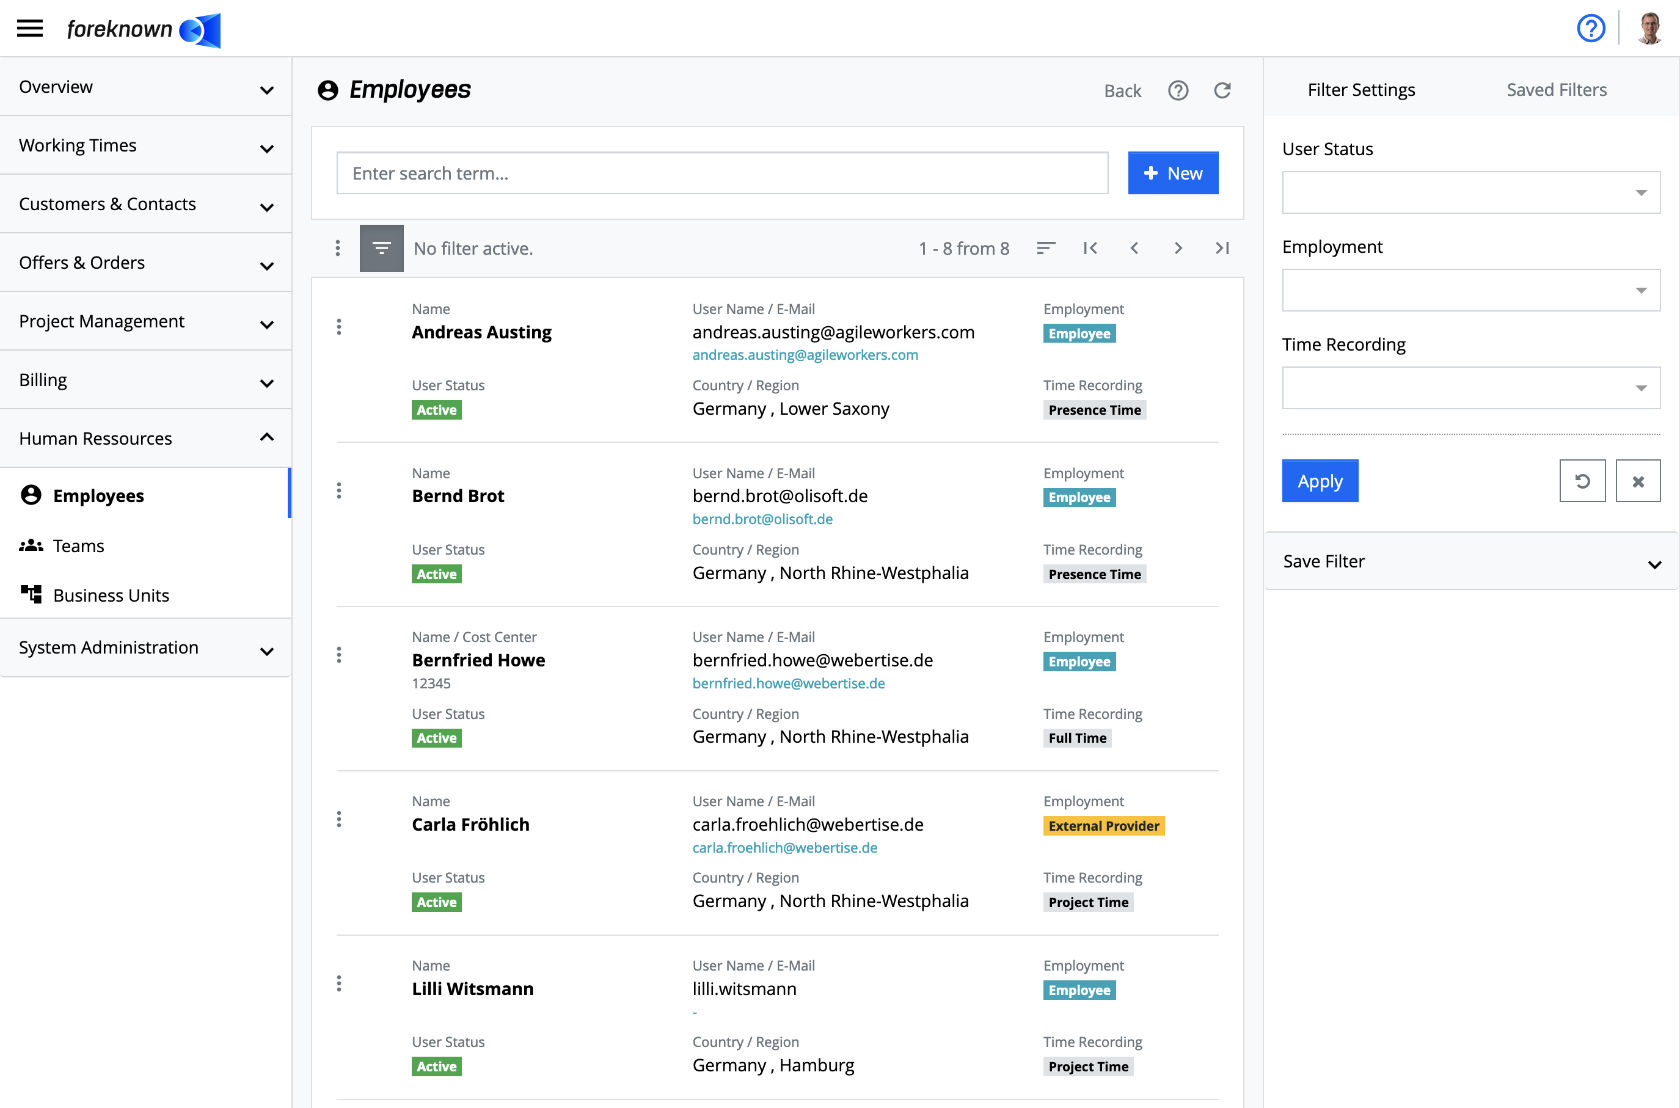
In the "Human Resources / Employees" section of foreknown you manage all the employees of your company and their basic contract data regarding working hours, vacations and bank holidays.
For an employee there must always be a user in foreknown, so that this employee can also log in to foreknown, e.g. to book working hours. Depending on the authorization, employees can also be stored as "responsible persons", e.g. for customers, offers and orders.
Manage Employees
All actions to be able to create, edit, search and delete employees are described below.
Search Employees
In the upper area of the "Employees" dialog is the search field and the "+ New" button (see also Create Employee). Below this area all already created employees are displayed in form of a scrollable, sortable and filterable list.
If you now enter a search term in the input field, the list will only show the employees that contain the entered search term in their name. In this way, individual employees can be found and edited quickly.
Filter Employees
Employee management offers the following filter settings:
The "Apply" action will display all employees in the list that match the filter criteria. The "X" action removes all filter settings and the list displays all employees again. The "Reset" action (icon: arrow in a circle) will discard all the changes made to a saved filter, if any.
- User status: It is possible to filter for employees, whose associated user has a selected status (Inactive, Active, Waiting, Locked).
- Employment: Selection of one or more employment types (employee, external provider).
- Time Recording: Selection of one or more time recording types (Project Time, Presence Time, Full-Time).
For general information about the filter options, see also the chapter Basics: Filters.
Create Employee Reports
The employee management offers the option of creating individual employee reports based on all or filtered employees. The action menu above the employee list (button with three dots) offers the action "Create Report", which opens the following pop-up dialog:
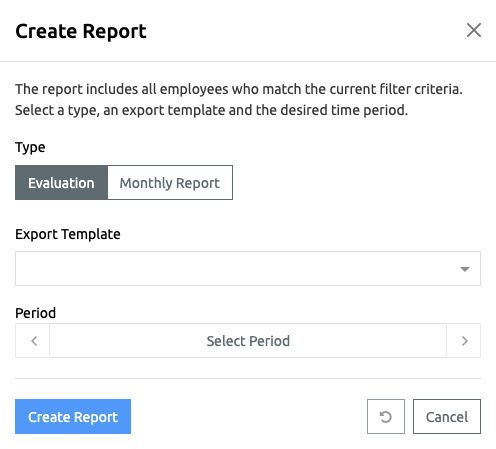
The first step is to select the type of employee report. A distinction is made between the following types:
- Evaluation: This report type provides an evaluation of activity bookings, on-call times, vacation and general absence times for each selected employee. The evaluation takes place exclusively at the level of the absence types and does not take into account any absence reasons.
- Monthly Report: This report type provides a month-based evaluation of absences based on absence reasons. Absences are displayed for each day of a selected month in the form of abbreviations and totaled per absence reason in additional columns.
Depending on the selected type, an export template can be selected. These are created in the template management at "System Administration / Templates" with the basic template "Employee report" for the type "Evaluation" and "Monthly Employee Report" for the type "Monthly Report" and can be customized.
Documentation Note: For general information on the templates, see also the chapter System Administration / Templates.
A period must be selected for the report for which certain information is to be taken into account, e.g. the total overtime for the current year.
The "Create Report" action collates the data for all filtered employees and exports it to an Excel file based on the selected template. As soon as the export has been completed, the "Download Report" action appears, which allows the Excel file to be saved locally.
The "Reset" action (symbol: arrow in circle) resets all changes made in this pop-up dialogue. The "Cancel" action closes the pop-up dialog.
Create Employee
To create a new employee, click on the "+ New" button located at the top right of the search box. This button will open the "Create Employee" popup dialog.
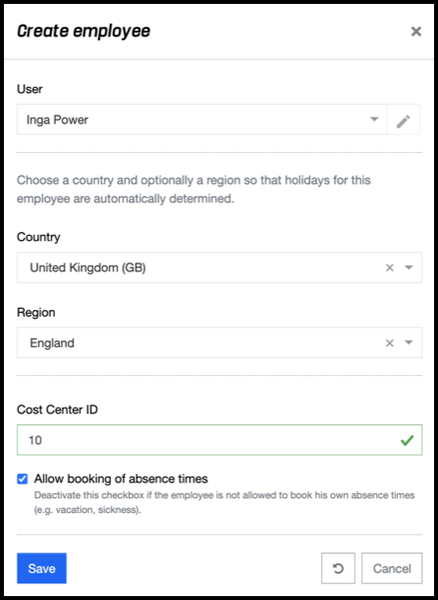
The following properties must be specified for a new employee:
- User: An existing user must be selected from a drop-down list.
- Country: From a drop-down list a country e.g. Germany must be selected.
- Region: From a drop-down list, if this was filled after the selection of a country, a region e.g. Hessen must be selected. There are regions like Bavaria, where subregions are needed like Regensburg, Ingolstadt to get the correct bank holidays for employees of that region.
- Cost Center ID: The cost center serves as additional information about an employee and is, if maintained and used in the Excel template via the placeholder [#LIST#employeeWithCostCenter#], displayed on the activity export together with the name of the employee. The cost center is also displayed after the employee in case of grouping with employees.
- Allow booking of absence times: If this flag is deactivated, only the Team Manager or HR Manager can enter absences. If the team manager himself has the flag inactive, he can only maintain the absences for his team members but not for himself.
The specification of a country and if available a region is necessary to be able to determine the suitable bank holidays for an employee.
With the action "Save" a new employee is created. With the action "Reset" and "Cancel" the entries are discarded and in case of the action "Cancel" the dialog is closed.
Edit Master Data
The master data of an employee can be edited via a popup dialog. This is opened from the list of employees via the action menu with the action "Edit Employee" in each row.
This opens the "Update Employee" dialog, which can be used to change all of an employee's properties. Also see the description of the Create Employee dialog.

The "Save" action will save the changes made to the employee. The "Reset" and "Cancel" actions discard the entries, and in the case of the "Cancel " action, the dialog is closed.
Via the action menu, an existing employee can be deleted with the action "Delete Employee". A confirmation dialog opens, which must be confirmed with the action "Delete".
Manage Employee Contracts
Employee contracts provide important information about employee availability. An employee contract contains the working hours per weekday in hours (also as decimal numbers), and the number of vacation days per year. In addition, imputed costs and a target agreement regarding workload and billing rate can be stored.
NOTE: When creating an employee, a contract is automatically created that initially includes a 40-hour week with 8 hours per workday and 20 days of vacation. The contract data should therefore be adjusted directly for new employees!
Edit Contract
In the lower area of the detail view, which can be opened by clicking on an employee in the list, the tab "Contract Data" can be found. Via the action menu of a contract, the following dialog can be opened with the action "Edit Contract".
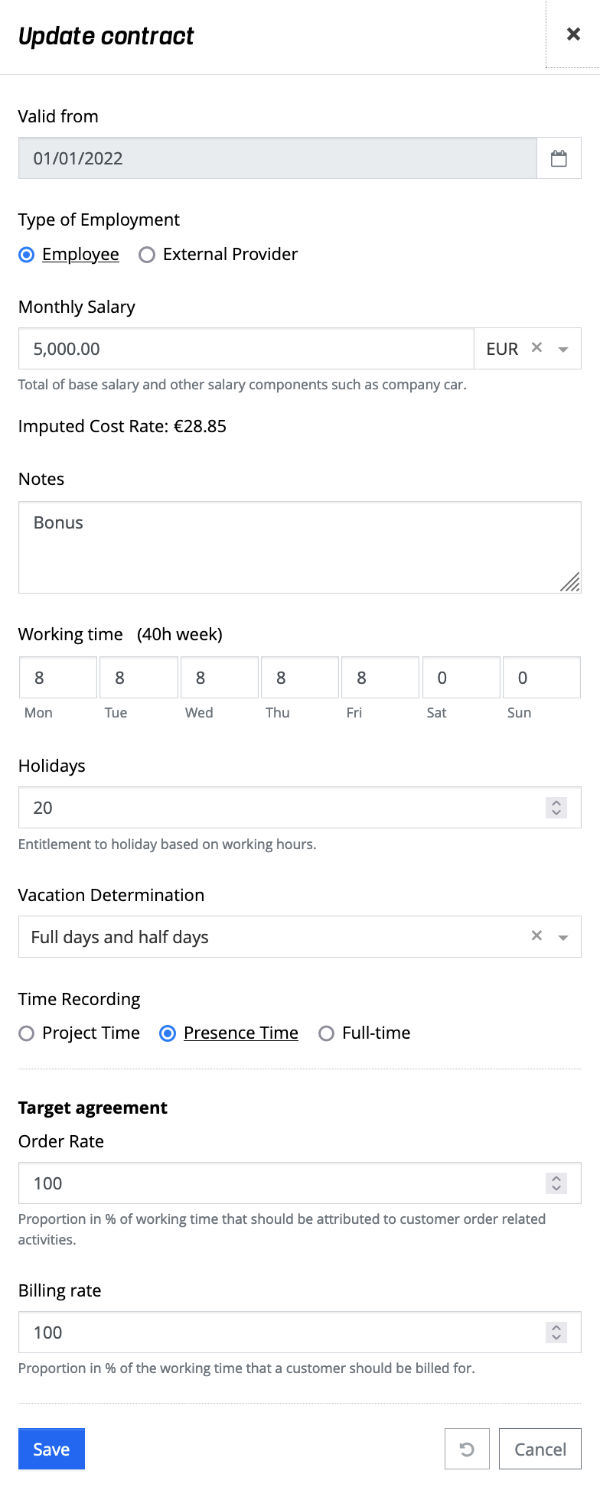
The following properties can be changed for an existing contract:
- Valid from: Specify the date from which the contract is valid. Can only be set on creation of a contract.
- Employment: Indicates the type of employment relationship. Depending on this the personnel costs
are calculated.
- Employee: This employment relationship describes an employee of the company. Therefore also the field "Monthly salary" is displayed, which contains the monthly salary including other salary components.
- External Provider: This employment describes an employee of another company or a freelancer. Therefore, the field "Hourly Rate" needs to be filled on which the monthly costs are calculated.
- Monthly Salary: Sum of the monthly basic salary plus monthly additional costs, in order to be able to calculate the monthly personnel costs can be calculated.
- Imputed Cost Rate: Represents an hourly rate used to calculate variable employee costs.
Calculation: Monthly salary * 3 months / 13 weeks / number of hours per week.
- Hourly Rate (third party providers only): Hourly rate of the third party provider to be able to calculate the monthly personnel costs.
- Notes: In this field the composition of the monthly salary can be noted.
- Working time: Here the working time is entered in hours (also decimal numbers) for each individual weekday.
- Vacation days: The number of agreed vacation days is entered here. Full and half days are possible.
- Vacation Determination: This setting determines how the employee can book his/her vacation.
- Full days and half days: Absence times of the type "Vacation" are counted as half days if the employee has to work
at least 6 hours on a day, but has specified an absence time of <= 50%. Absence times > 50% always represent a
full day of vacation.
Example: An employee always has to work 8h on Mondays. He/she enters 4h of vacation. A half day of vacation is is booked for the employee. If he/she had entered 6h, a full day of vacation would have been booked.
- Full days: Absence times of the type "vacation" are always counted as full days, even if e.g. only 4h vacation was entered.
- Full days and half days: Absence times of the type "Vacation" are counted as half days if the employee has to work
at least 6 hours on a day, but has specified an absence time of <= 50%. Absence times > 50% always represent a
full day of vacation.
- Time Recording: Defines the type of time recording.
- Project Time: Employees with this type of time recording can only book activities. It is not possible to record presence and break times. Is usually used for external providers.
- Presence Time: Employees with this type of time recording must maintain presence, break and absence times. The recording of activities is optional and the sum of booked activities also does not have to match the entered working time.
- Full-Time: Employees with this type of time recording must maintain presence, break and absence times. In addition, the recording of activities is required and the total of booked activities must match the specified working time.
- Target agreement:
- Customer Order Quota: Here the percentage of booked working times is defined for an employee, that is to be spent on customer-related orders.
- Billing quota: Here the percentage of booked working times is defined for an employee, that should be billable via customers.
The "Save" action saves the changes to the contract. With the action "Reset" and "Cancel" the entries are discarded and in case of the action "Cancel" the dialog is closed.
Via the action menu of a contract, a contract can be removed with the action "Delete Contract". A confirmation dialog opens, which must be confirmed with the action "Delete".
Create Contract
At the bottom of the detail view, which can be opened by clicking on an employee in the list, is the "Contract Data" tab. In the upper right corner of the "Contract Data" tab is the "Create Contract" button. Clicking on this button opens a popup dialog which allows the definition of all properties of a contract (see Edit Contract). All fields with the exception of the "Valid from" date are preset with the settings of the current contract and can then be customised.
With the action "Save" a new contract is created. With the action "Reset" and "Cancel" the entries are discarded and in case of the action "Cancel" the dialog is closed.
Set Contract End Date
There are various reasons why an employee contract is given an end date.
- An employee leaves the company at a certain point in time.
- A new contract with modified contract terms is created. This automatically results in the previous contract an end date that is one day before the start date of the new contract.
- There is a period between the old and new contract during which the employee does not have a contract with the company. In this case, an individual contract end date can be set on the old contract.
The contract end date is important for foreknown for various reasons. For example, changing a contract can influence
- the type of time recording, for example if time recording of the type "Project Time" is set up to a certain point in time and then "Presence Time" is set thereafter.
- the calculation of personnel costs if other personnel costs are stored in a new contract.
- the calculation of vacation entitlement if the number of vacation days has been changed in a new contract.
In the detailed view of employees, all existing contracts of an employee can be found under the "Contract Data" tab. The following dialog can be opened via the action menu of a contract with the action "Set Contract End Date".
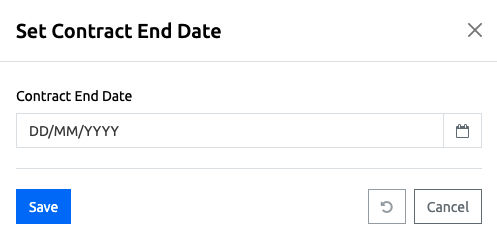
The contract end date is requested in this dialog. The "Save" action sets the new contract end date for the selected contract. The "Reset" and "Cancel" actions discard the entry and the "Cancel" action closes the dialogue.
Manage Staff Costs
The "Staff Costs" tab is located below the master data. There, all staff costs of employees or external providers for a selected year are displayed. Additional costs, such as bonus or overtime payments, can be added on a monthly level.

The "Current Year" button is used to retrieve the staff costs for the current year. By using the arrow keys you can scroll through other years.
Notes on the calculation of staff costs: **.
- Employees: For the calculation of staff costs, the monthly salary of the employee contract is used. If there is a change of contract within a month, the salary of the current contract is used for the calculation of staff costs. There is no daily-based salary calculation per month. However, for the month can be created for the month.
- External Provider: For the calculation of the staff costs, the sum of the recorded working hours of the month is multiplied by the hourly rate stored in the contract. If a new contract with a new hourly rate is created within a month, the correct hourly rates are used for each day.
The specification of staff costs is required in order to be able to obtain a contribution margin calculation in foreknown.
Create Staff Costs
To create additional staff costs, you can either click on the "+" button above the list or in each month row. This will open the "Create Staff Costs" dialog.
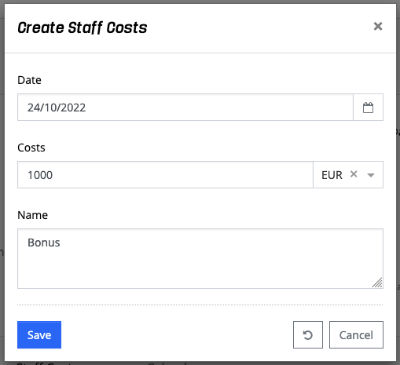
The following properties can/must be specified for new staff costs:
- Date: The date on which the cost entry are incurred.
- Cost: The amount and currency of the cost entry.
- Name: A short description for the cost entry.
The "Save" action creates the new personnel cost entry and displays it in the list.
Edit Staff Costs
Existing staff cost entries can easily be adjusted via the action menu (three dots in front of each entry) with the action "Edit Staff Costs" action. The "Update Staff Costs" dialog opens.
Here all data (see "Create Staff Costs"") can be edited.
If staff cost entries are to be deleted again, this is possible via the action menu with the action "Delete Staff Costs". delete". A dialog will open where the "Delete" must be confirmed again.
Manage Time Account
Under the "Time account" tab, the HR manager can view the current or past annual overviews of the current employee's working time account and vacation account and book debit and credit entries.
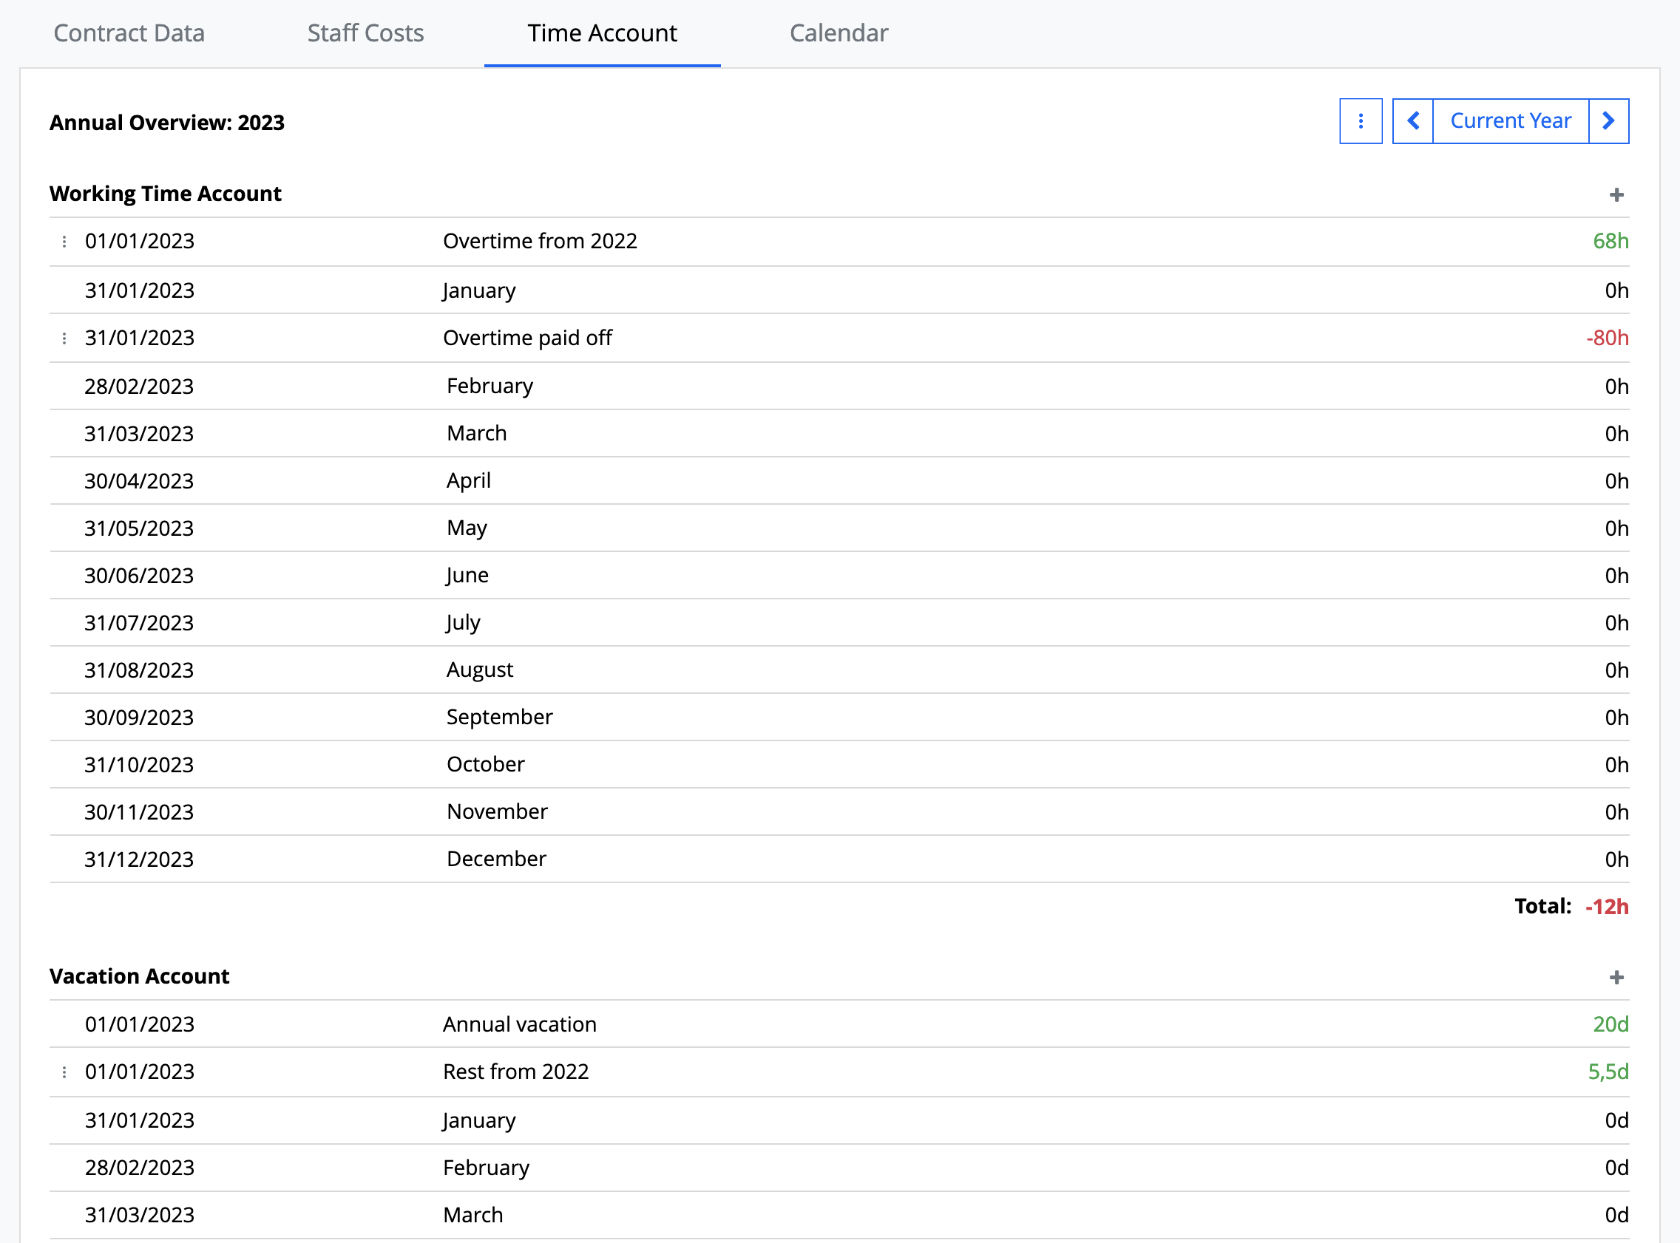
Working Time Account
The working time account lists all monthly balances and additional entries in chronologically ascending order. Via the "+" link, a new booking can be created for a working time account. For this purpose the following information must be entered:
- Date: Selection of a booking date.
- Value: Specification of a duration e.g. 3h 30m. Negative values are also possible.
- Name: Specification of a name for the booking.
Examples
- An employee collected 34 overtime hours at the end of the year, which should be carried over into the next year > as a new start balance.
- An employee got 20 overtime hours paid. Then a corresponding negative value is booked.
Via the action menu (three small dots) in front of a manual entry, an entry can be edited or deleted.
Vacation Account
The vacation account lists all monthly balances and additional bookings made in chronologically ascending order. A new booking for a vacation account can be created via the "+" link. To do this, the following information must be specified:
- Date: Selection of a booking date.
- Value: Specification of a duration e.g. 2d. Negative values are also possible.
- Name: Specification of a name for the booking.
Examples:
- An employee has not used 2 days of the vacation days at the end of the year. These vacation days shall be carried over to the next year.
- Two vacation days have been paid to an employee. Then a corresponding negative value is booked.
Via the action menu (three small dots) in front of a manual booking, a booking can be edited or deleted.
Manage Employee Appointments
The administration of appointments for employees is used to record days of absence, e.g. due to vacation, illness or other reasons for absence. Absence times must be recorded in order to be able to determine the actual availability of an employee and thus also a correct determination of e.g. the utilization and billing rate.
Create Appointment
In the detailed view under the "Calendar" tab, the employee's appointments for the current month are displayed below the "Assigned Calendars". You can scroll back and forth month by month via a navigation in the upper right corner. Clicking the "Today" button jumps to the current month. By clicking on the "+" symbol in the upper right corner, the "Create Appointment" dialog opens.
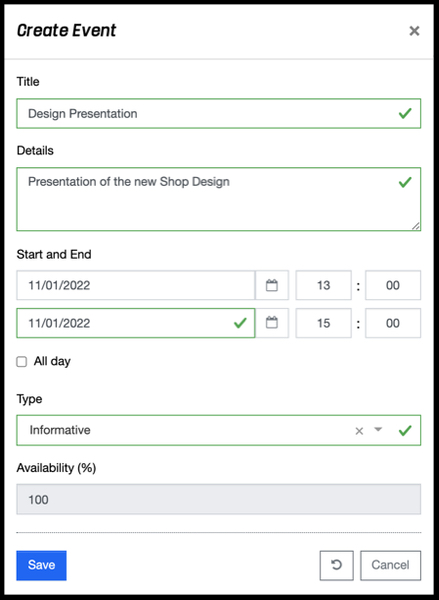
The following properties must be specified to create an appointment:
- Title: The title of the appointment is specified.
- Details: Additional information about the appointment can be entered here.
- Start and End: The start and end date and time are specified (the appointment can be marked as all-day by means of a checkbox).
- Type: The type of the appointment can be selected from a drop-down list.
- Non Business
- Vacation
- Absent Time
- Informative
- Custom
- Availability in %: Here the availability during the appointment can be specified in %. (can only be freely entered for "Type: Individual").
With the action "Save" a new appointment is created under the employee. With the action "Reset" and "Cancel" the entries are discarded and in case of the action "Cancel" the dialog is closed.
Edit Appointment
From the action menu of an appointment, the "Edit Appointment" action can be used to open the "Update Appointment" dialog. All properties of an appointment can be changed via this dialog. See also the description of the Create Appointment dialog.
With the action "Save" the changes to the appointment are saved. With the action "Reset" and "Cancel" the entries are discarded and in case of the action "Cancel" the dialog is closed.
Via the action menu of an appointment, which is offered in each line per appointment, an appointment can be removed with the action "Delete Appointment". A confirmation dialog opens, which must be confirmed with the action "Delete".